Head Gasket Trouble - Pull Engine

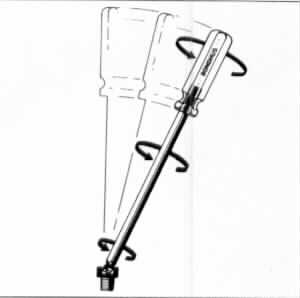
So back to VTG, tell me what you guys think of this video I took while installing the new pushrods. It's not steady but you can kind of get a look at the geometry. Looks like the pushrod is short enough it's throwing the 90 degree angles off from both the pushrod side 90 degree and the valve side 90 degree.


20150515_193105.mp4 Video by twildt | Photobucket
 

Attachments

  • th_20150515_193105.jpg
    th_20150515_193105.jpg
    6.1 KB · Views: 187
  • Sponsors (?)


Yeah that looks waaaaay off, that pushrod is definitely too short. if you have the stockers still, id throw one in just to see where it sits. Stock should be 6.25"long iirc, and you'll probably end up needing longer than that.

The goal is to get as short of a sweep of the rocker tip on the valve as possible, not just to center. The shorter the sweep, the more linear motion you get. Not only does it make the valve move more, it also keeps from side loading it. Centering the sweep is nice, but is a far second place to a short sweep.
 
Progress update:

I left off with valve train geometry. I got my new pushrods installed and heads bolted on. Roller rockers installed. Valve lash set. Valve covers installed.

I ended up needing a replacement clutch after finding the existing clutch was wrote out. It turned out the PO had installed a centerforce dual-friction clutch. Pretty advanced clutch. Way more than what was needed with around 285rwhp at that time. Unfortunately he kept the stock flywheel on it. This is supposedly a wrong combo to use together and may be why it was wrote out so quickly but I can't really say when the clutch was installed so maybe it was fine. So I'm in the hole for upgrades like a new cam, heads, intake because of this during my planning stage right. I ended up going with a stage 2 Exedy Mach 400 clutch and ford racing billet flywheel.

First thing I installed new pilot bearing. Ripped out old one with rented pilot bearing removal tool and a slide hammer. Came out in two pieces. Remember there is a adjusting nut on the pilot bearing tool that locks the fingers behind the pilot bearing before you go slide hammering;). Flywheel didn't come with dowel pins so beware of this when you buy a new one. Once all the parts arrived installation was easy. I have the 50oz off balance(1989) and it was sent off to machine shop with engine to be apart of the balancing. Starter plate went first, then the flywheel. Thread-locker blue and torqued to 85ft-lbs.

20150520_214019.jpg


Dowel pins just knocked in easily with a hammer. Next the clutch. Pretty simple install. Dowel pin kit came with new pressure plate bolts. Use thread-locker blue on them and torqued down to 35ft-lbs.

20150520_223203.jpg

Then the new throwout bearing was properly greased and installed on the existing clutch fork. Pivot stud and fork were in good condition. Fork installed into bell housing and torqued to 25ft-lbs.

20150520_225526.jpg
 
Last edited:
Status update:

Next up was spark plugs. Switching to aluminum heads also meant switching to a different size spark plug. FloTek recommended plug was AGSF-32C. This is a much larger plug than the e7te used. Previously on the e7'S I was using Bosch Iridium's. Now after doing some research on this topic I found some contradiction between what racers were using and what the forums were saying. Most forum guys say to stay away from the iridium style plug, especially on blown applications. But then racers were using iridium plugs made by NGK for the most part. I won't pretend to have fully understood everything I read, nor did I need to at the moment(imo).

What I pulled from all the debate over plugs was this. Each plug has its own properties and they all work fine for their intended application. You just have to know your application ;-)

Now my application is a blown 302, aluminum heads, forged pistons, (insert the rest of required information here, it's a lot). I'm not racing on weekends at the track. I'm not using as a daily driver either but may use as a backup DD for short periods of time. When I do get it out I don't constantly throw WOT, I chill down the asphalt mostly but like to blow away the occasional Camaro when I feel like it. Cuz those guys just feel like their 350's are inferior... And the look on their face, priceless.

I also learned about heat ratings and finding the coldest plug you can run with your application. This is a very detailed matter when finding the best spark plug giving you the best results possible. I may drop to a colder plug next time I change plugs or find issues during routine maintenance but for now I'm starting with recommended.

NGK's are expensive, Motorcraft is not. NGK comes iridium mostly because its a better material for efficiency. Motorcraft is copper with know good results for street applications. I went with Motorcraft. That's how I decided for me. End of story.


Check out the size differences between my old plugs and new ones.

20150520_231657.jpg


Here is a good view of the electrode difference.

20150520_231715.jpg


EDIT: Not all NGK spark plugs are Iridium electrodes. They do sell copper as well. I found the cross-reference for AGSF-32C is the NGK 2238. Price isn't all that bad staying with the copper alternative from NGK. Iridium is a different story.

AGSF-32C = $1.97
NGK2238 = $2.89
NGK7164(iridium) = $7.83

upload_2015-6-12_13-45-30.png
 
Last edited:
Been a while since I posted. Been busy I guess. Further updates below.

I have MAC shorty headers. These things have always been good to me as far as sealing against the heads(and I have used at least 2 different kinds of gaskets). But where they give me trouble is bolt access. And the passenger side I found out is a little bent out of shape. It's not easy getting the bolts started and not to mention tight enough as I had to use crazy sockets and inventions to adapt to my sockets to get the suckers bolted down properly.

Well I finally bit the bullet and ordered new bolts from ARP. Boy did I hit the jackpot. I reduced the size of the heads down to 5/16. This is a really small bolt head but it allows me to get a nice closed-end ratchet wrench on them making it easier to get between the tubes and tighten the bolts down.

Now, with my new heads, I had to modify the header/manifold gaskets I had previously bought to work with my E7's. I ended up using a diamond bit burr and a die grinder to enlarge the openings to match the new heads. Previously I had already enlarged the header openings by cleaning up the nasty leftover welds by the manufacturer.

Check out the difference in size! This will eventually help make some HP.. :burnout:


20150521_180004.jpg

20150521_175943.jpg

20150521_175935.jpg


Tags: Enlarge gasket, enlarge header gasket, enlarge manifold gasket
 
I have a somewhat less expensive but equally effective solution:
3/8-16 Stainless steel Allen head capscrews 7/8" long - 65 cents each.
images


Bondhus Ball driver power bit 5/16" - $6, allows you to use a torque wrench or ratchet to tighten the bolts. The ball end allows you to be at an off center angle and still get the bolts tight.
10813.gif

images

bon3.jpg
 
  • Like
Reactions: 1 users
I was always afraid to go the allen head route. My thought was it would be easier to strip out when tightening them to their recommended torque. But I guess that is not the case since you are using this method. I have the ball drivers. How about strength, I assume they will last as long as ARP hardware?

Personally I like the look of the allen head bolt better.

If you get high quality bolts, you should not have any problems.
 
Got the headers installed next. Had some help stretching the drivers side a bit while I slipped the bolts in. Not too bad. It's funny I have to stretch them but they seal good. Go figure.

Again, here is a quick pic of the work I did to the headers previously to match my e7te heads. I actually went as far out as I thought I could without harming the integrity of the welds. Should help with my new FloTek aluminum heads as large of port they are.

Before:

20150317_205021.jpg

After:

20150317_205051.jpg


After headers were installed and spark plugs it was time to bolt up the transmission and drop her back in the car. I had plans to replace the 4 bolts that hold on the trany as the heads were a little stripped from previous owner. PO had replaced the original clutch before. I grabbed some grade 8 bolts from my bin they were close enough to get them tight but they slipped in the threads. My heart sunk. Luckily they were just wrong thread size and I put the originals back in with no issue. I should have replaced but I'm not worried. They weren't stripped that bad and the threads are in really good shape still. Just cleaned them up and put some anti-seize on them.

I drained the fluid when I took the tranny out. Didn't have one of those cool plastic tranny caps to hold the juice in. It's still empty. I planned on refilling when I get it back in car. No big deal.


20150521_201111.jpg


20150521_201130.jpg


20150521_204932.jpg


It was a snap getting her back home. I bought new motor mounts. No issues there. When I took the old ones off months ago I set them on their respective side of the car so I knew which was which. Then I took the new ones and matched them up and installed. I installed them on the motor before I dropped her back into the bay. Made it easier I read somewhere and that info was correct. :nice:
 
  • Like
Reactions: 1 user
I was always afraid to go the allen head route. My thought was it would be easier to strip out when tightening them to their recommended torque. But I guess that is not the case since you are using this method. I have the ball drivers. How about strength, I assume they will last as long as ARP hardware?

Personally I like the look of the allen head bolt better.

I've looked at the bolts with the self locking heads and have even safety-wired a set before. It's all a pain in the ass when you start getting toward the rear cylinders on the passenger side.

I've been using a set of internal wrenching bolts on my headers since the last install. The rear bolt on the pass side is still a pain in the ass but it's def easier being able to slip a T-handle or S shaped wrench back there to check or tighten it. Red thread lock helps a bunch too. The hardware has to be quality made though. I can and have stripped out internal wrenching bolts (good ones mind you). It's very much like snapping the head off of a regular bolt in terms of removal.

I would say that for header bolts that I'm half and half split between a quality round top 12 point, and an internal wrenching bolt. That's a tough one. A stainless ARP 12-pt is hard to beat.
 
Wrapping up the reassembly. Part 1.


I didn't get pics of my 'under the car' work, bolted up the tranny, crossmember stuff, h-pipe, driveshaft, exhaust, wire connections to tranny, o2 sensors, and starter, and finally the clutch cable. It took me 3 friggin times till I figured out the order in which the trans crossmember and exhaust pipes went... I think I spent 3 hours total under the car and called it a night when I finished. Sucked.

Lower intake installed. I dry fitted the intake and checked all bolt holes to make sure they aligned properly. I noticed the gap was pretty large between the intake and engine/heads. I used "the right stuff" sealant between the two. When I put a thick bead down and dropped the lower back down the bead didn't touch the intake so I ended up pulling it off again a stacking another bead on top of the first. It touched this time but just barely. But when I torqued the intake down it sucked it way down so the first bead might have been enough. What I do know is that it didn't squeeze out much excess so I think I did just fine.


I've used the rubber rail gaskets before with a bead in the corners(where rails meet heads) and I've used the cork rail gaskets with beads in the corners. Rubber did the best but I didn't have luck with cork. Small leak each time under the front left side and puddled in the upper timing cover.


Rear plug installed(drivers side lower intake) and front water temp sensor installed. The new plug and sensor already had thread sealant on the threads.

20150523_000401.jpg

Rear passenger side egr spacer water line nipple installed. Bolts torqued to 18 then 24 ft lbs in the correct sequence. I ended up going over the bolts like 3 times on the 24 ft lbs as the gaskets compressed.

upload_2015-8-3_14-51-34.png


20150523_000407.jpg

Hard heater lines installed. Sealed with permatex #2 sealant. I found that a crows foot works pretty good when tightening the nut for the rear bracket. Still sporting factory temp sensor in the hard line. 2 Heater core hoses connected.

Notice the intake ports, inner walls are rough, I actually hit them with my die grinder and burr and removed rough casting. I didn't sand and polish them up yet. I plan on doing this when I do my next upgrade (42 lb injectors, MAF sensor, and a tune). It will be a full head and intake port match n polish.

20150523_003653.jpg

Fuel injectors installed with new o-rings and a very thin film of grease for ease of installation and seal.

20150523_004454.jpg

Fuel rails installed. Still stock FPR on rail.

20150523_010225.jpg

Wiring harness connected. Rear water lines connected to heater core and got EGR spacer water line connected. Thermostat housing installed(perm #2 on both sides paper gasket). Bought a racing style 192° thermo not long ago. Reused it. I've always used a 180° but never got very warm in winter time. I've also read somewhere that I might get better heat transfer using the original engineers design for this motor. I dunno. :shrug:

20150523_013036.jpg


Fuel lines installed to fuel rail. Water pump installed. I throw on some rubber gloves and using my index finger and thumb coat both sides of paper gasket with real light film of perm #2. Never had issues. Long time ago i bpught a new set of water pump bolts from LMR. Mustang Water Pump Studs & Bolts (79-93) 5.0 5.8


Super happy I did. I've been keeping the bolts coated with antiseize except for the bolts that break the water jackets. They get perm #2. I put antiseize on all bolts I can, that stuff just plain makes all the difference when you have to take things apart.


You can see in this pic my wire harness ground wire. I ended up soldering a new connector on it after it was damaged some time back. Heat shrinked over the solder.


20150523_135130.jpg


Water pump hoses connected. Bypass hose had a rip in the under side of 90° bend during inspection. Almost didnt catch it. Missing that would have pizzed me off. Got a new one.

With new heads and valvetrain I needed the taller valve covers. Which meant upper intake clearance problems. BBK intake spacer installed with new studs in the 4 corners.

Vacume lines prepped for upper intake.

Also it was a day later and I rechecked my torque on lower intake bolts. They needed a little more tightening after overnight settling.


20150523_172416.jpg


Part 2 coming soon.
 
Last edited:
  • Like
Reactions: 1 user
Upper intake installed. Wish I would have taken pictures of my vacume lines. They were a bit different from old intake. Different connection locations that is. I ended up reusing the line underneath the old intake. Other lines were new. I basically figured out it didn't matter much where you connected everything as long as you had the right size lines.

New 70mm throttle body installed. Reused TPS, IAC, and EGR.

Notice the 2 bolts to of intake plenum. Ended up having to use original bolts because the intake spacer rendered the new bolts in the kit useless, too short. Originals were off course to long so I used washers to take up the space till I find suitable replacements.

20150523_180432.jpg

20150523_180443.jpg

20150523_180451.jpg


Forgot to mention I installed the oil dipstick tube. Remember to do this before you bolt down the headers as the bracket is held on by one of the bolts.

20150523_013652.jpg


All the vacume lines were connected. IAC connected. TPS connected, and throttle cable bracket installed. The plastic connector for my cruise control broke so I'm trying to track another one down if anyone knows where I might find one.

Also with new intake there isn't a place to clip on the salt n pepper shakers so they are just sitting back there in their new home.

Power steering bolt installed to driver side head. Water lines installed and clamped down.


20150523_182220.jpg


Power steering pump installed. A/C compressor and brackets installed. Dizzy dropped in(oiled up the shaft with regular oil). Spark plug wire ran. Oil sensor plugged in. The gold steel braided line is T'd into my oil sensor connection and feeds my vortech S/C.


20150523_201627.jpg

20150523_201636.jpg

20150523_201647.jpg

20150523_201702.jpg

20150523_201718.jpg


Bottom left is 3g alternator, up is smog pump, and on top of course is my vortech v2. I mounted the smog pump for now but it's not connected to anything. I deleted all the smog equipment. I will figure out what I'm going to do with it later. Maybe delete kit, maybe not.

20150523_222844.jpg


This is hoses and valves for thermactor system(smog).

20150523_233043.jpg
 
  • Like
Reactions: 1 user