Oh My GOD!!!!
I'm never going to do this EVER again!
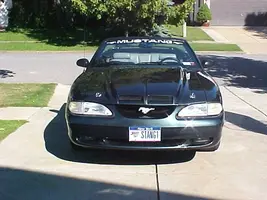
When I bought my ram air hood from Suncoast Creations, I didn't realise that after market hoods were required to meet certain safety standards. As such, the day before it was scheduled to arrive, I bought some hood pins.
The next day I took the car and new hood into a shop and had everything done professionally including color matching. I requested that the shop put the pins in, but when I went to pick up the car, they decided not to as there was really no place to put them in with all the under hood ducting built in to the hood. Besides, they said that all hoods like this are supposed have these certain safety standards built in.
About a year after the hood was on, I noticed the cheap-ass rivets holding in the hood latch locking mechanism were all loose. I drilled them out and put bolts, washers, and locking washers in.
A year after that, while driving down the Thruway (last week), I noticed my hood jumping up and down at 70mph. So, after two years, I finally got around to installing the hood pins that were lying in the bottom of a toolbox in the garage all covered in dust.
I figure, well, I'll spend some good quality time with my car today, a little male bonding I guess for two hours. Nope! It took me 7 $#^$#@^ hours to get these simple little things put in, and a trip to the hardware store to buy a new metal grinding wheel.
The shop was right, the ducting and double layer of the hood prevented putting the hood pins right into existing metal, so I opted for the headlight covers as thay are held in with a few hundred screws. Normally the pins are adjustable with a nut on either side of the metal to secure them into and be hight-adjustable. To make a seven hour long story short, I cut the pins down, twice, measured everything at least ten times over with the aid of paper overlays on the top and bottom of the hood, fabricated offset rubber bushings and finally installed them.
You only get one shot at drilling a hole in a thousand dollar hood, so I took my time (obviously!). In the process, I had to pull my headlights, which I never really got out of there despite having a Chilton's book in front of me (almost useless), and left about two inches of skin in various places in the driveway, on the hood, on the engine, in the garage, and all over the front door! It looked like a murder happened, and all I did was "scrape" my knuckles!
In short, unless you have the time, patience, mathematical knowledge, and bravery, TAKE IT SOMEWHERE TO BE DONE! I'm sure it would have been easier on a stock hood, or at least a non-ram air hood of this type, but I needed a little reassurance that my hood wouldn't go flying off my car, and where I decided to attach the pins, this would at least give me a margin of safety to pull over without causing any accidents if the hood latch were to give out. Besides, I think they look good!
Done. I'm drinking beer now after that ordeal, and you can have a look see below...


I'm never going to do this EVER again!
When I bought my ram air hood from Suncoast Creations, I didn't realise that after market hoods were required to meet certain safety standards. As such, the day before it was scheduled to arrive, I bought some hood pins.
The next day I took the car and new hood into a shop and had everything done professionally including color matching. I requested that the shop put the pins in, but when I went to pick up the car, they decided not to as there was really no place to put them in with all the under hood ducting built in to the hood. Besides, they said that all hoods like this are supposed have these certain safety standards built in.
About a year after the hood was on, I noticed the cheap-ass rivets holding in the hood latch locking mechanism were all loose. I drilled them out and put bolts, washers, and locking washers in.
A year after that, while driving down the Thruway (last week), I noticed my hood jumping up and down at 70mph. So, after two years, I finally got around to installing the hood pins that were lying in the bottom of a toolbox in the garage all covered in dust.
I figure, well, I'll spend some good quality time with my car today, a little male bonding I guess for two hours. Nope! It took me 7 $#^$#@^ hours to get these simple little things put in, and a trip to the hardware store to buy a new metal grinding wheel.
The shop was right, the ducting and double layer of the hood prevented putting the hood pins right into existing metal, so I opted for the headlight covers as thay are held in with a few hundred screws. Normally the pins are adjustable with a nut on either side of the metal to secure them into and be hight-adjustable. To make a seven hour long story short, I cut the pins down, twice, measured everything at least ten times over with the aid of paper overlays on the top and bottom of the hood, fabricated offset rubber bushings and finally installed them.
You only get one shot at drilling a hole in a thousand dollar hood, so I took my time (obviously!). In the process, I had to pull my headlights, which I never really got out of there despite having a Chilton's book in front of me (almost useless), and left about two inches of skin in various places in the driveway, on the hood, on the engine, in the garage, and all over the front door! It looked like a murder happened, and all I did was "scrape" my knuckles!
In short, unless you have the time, patience, mathematical knowledge, and bravery, TAKE IT SOMEWHERE TO BE DONE! I'm sure it would have been easier on a stock hood, or at least a non-ram air hood of this type, but I needed a little reassurance that my hood wouldn't go flying off my car, and where I decided to attach the pins, this would at least give me a margin of safety to pull over without causing any accidents if the hood latch were to give out. Besides, I think they look good!
Done. I'm drinking beer now after that ordeal, and you can have a look see below...


 I wear my busted knuckles with pride.
  Shows you do your own work and don't pay people to do it all for you.


")