Control arm mods and new cowl scoop(pics)
I finished fitting the 17" Cobra R wheels on my II this weekend. I ended up modifying the upper arms to increase steering travel, because the inside edge of the wheels would hit the lip on the upper control arms, and the car turned as about as tight as a 10-wheel dump truck.
Anyway, I also installed 3" ARP race wheel studs and bought some cheap 7/16"-thick wheel spacers.
I had a few options to fix the problem, but my kids have me fairly broke at the moment, so I took the relatively inexpensive route.
I used a plasma cutter to trim the 3/4" reinforcing lip from the front area of the upper arms, and then boxed the the arms with some 3/16" steel plate to replace the lost strength of the removed lip.

Trimmed and smoothed arm.

Steel sections added to box the arm.

I left the lip on the rear of the arms, and overlapped my new steel about 2 inches past it.

Different view of boxed section. I shaped the steel to match the contours of the arms, and it runs up into the ball joint mounting flange area for strength.

Completed arm, bead blasted and ready for paint.
Both of the arms took me about 6 hours, including removal and reinstallation.
Now these cheap ass cast aluminum wheel spacers are made to fit several applications, so they don't fit any of them very well.
They didnt center on the hub at all, they kind of just slopped around on there. I checked the prices on real wheel spacers(billet aluminum cnc cut that fit perfectly and self centered) and they were about $100 a pair. I needed spacers on the back, too, because the tires were rubbing whenever the 'stang would hit a bump. I wasnt going to throw $200 on some damn wheel spacers.
So I modified the cheap ones. lol.
I first made a 5-lug 4.5" bolt circle jig for my drill press. Then I filled in the oval holes of the wheel spacers with plastic body filler. Once fully cured, I put the spacers on the jig, and drilled out all five 1/2" holes where they should be. Once the wheel is tightened onto the spacer, it will stay in place, so the plastic filler is only needed to hold the wheel spacer centered on the hub in the mean time.


Finished spacer, with perfect 1/2" dia. 4.5" bolt circle.
I used an 80grit bar sander to make sure the spacers were completely flat, with a fairly rough surface.
I installed some fabricated adjustable steering limiters that contact on the spindle near the caliper lower mounting flange, and I have them adjusted so they stop the wheels about 1/4" away from the upper arms.
Anyway, I tested the car out yesterday, up and down the road, and it turns tighter now than it did before with the stock wheels on it. No rubbing inside or out. It turned so amazingly tight in the yard, I'm more than happy with the results of my efforts.
Edit:


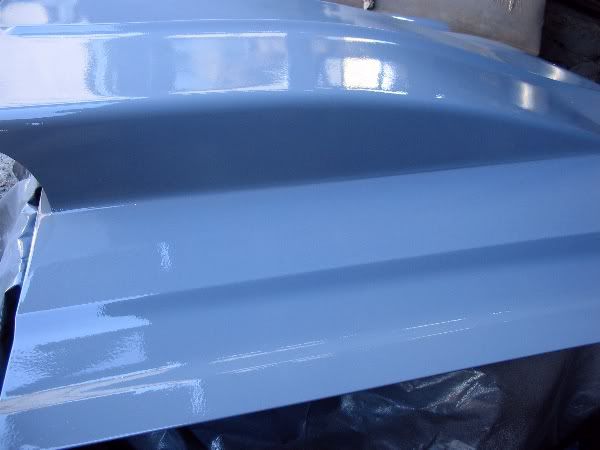
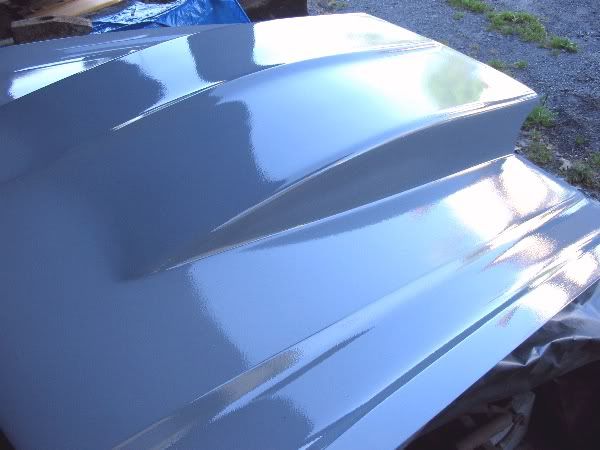
The new 5" cowl scoop, which I bonded, filled and primed. It's actually bolted back on the car now, until whenever I get around to finishing and painting it.
I finished fitting the 17" Cobra R wheels on my II this weekend. I ended up modifying the upper arms to increase steering travel, because the inside edge of the wheels would hit the lip on the upper control arms, and the car turned as about as tight as a 10-wheel dump truck.
Anyway, I also installed 3" ARP race wheel studs and bought some cheap 7/16"-thick wheel spacers.
I had a few options to fix the problem, but my kids have me fairly broke at the moment, so I took the relatively inexpensive route.
I used a plasma cutter to trim the 3/4" reinforcing lip from the front area of the upper arms, and then boxed the the arms with some 3/16" steel plate to replace the lost strength of the removed lip.

Trimmed and smoothed arm.

Steel sections added to box the arm.

I left the lip on the rear of the arms, and overlapped my new steel about 2 inches past it.

Different view of boxed section. I shaped the steel to match the contours of the arms, and it runs up into the ball joint mounting flange area for strength.

Completed arm, bead blasted and ready for paint.
Both of the arms took me about 6 hours, including removal and reinstallation.
Now these cheap ass cast aluminum wheel spacers are made to fit several applications, so they don't fit any of them very well.
They didnt center on the hub at all, they kind of just slopped around on there. I checked the prices on real wheel spacers(billet aluminum cnc cut that fit perfectly and self centered) and they were about $100 a pair. I needed spacers on the back, too, because the tires were rubbing whenever the 'stang would hit a bump. I wasnt going to throw $200 on some damn wheel spacers.
So I modified the cheap ones. lol.
I first made a 5-lug 4.5" bolt circle jig for my drill press. Then I filled in the oval holes of the wheel spacers with plastic body filler. Once fully cured, I put the spacers on the jig, and drilled out all five 1/2" holes where they should be. Once the wheel is tightened onto the spacer, it will stay in place, so the plastic filler is only needed to hold the wheel spacer centered on the hub in the mean time.


Finished spacer, with perfect 1/2" dia. 4.5" bolt circle.
I used an 80grit bar sander to make sure the spacers were completely flat, with a fairly rough surface.
I installed some fabricated adjustable steering limiters that contact on the spindle near the caliper lower mounting flange, and I have them adjusted so they stop the wheels about 1/4" away from the upper arms.
Anyway, I tested the car out yesterday, up and down the road, and it turns tighter now than it did before with the stock wheels on it. No rubbing inside or out. It turned so amazingly tight in the yard, I'm more than happy with the results of my efforts.
Edit:


The new 5" cowl scoop, which I bonded, filled and primed. It's actually bolted back on the car now, until whenever I get around to finishing and painting it.

