|
STEEDA Rear Quarter Moldings
|
|
|

|
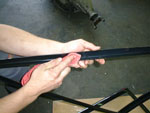
Here's what you get in the Kit: 2
molding covers and a tube of Adhesive Silicon. Steeda now ships it out with 2 tubes.
|
Everyone who has ever
owned a FOX2 (87-93) Late Model Mustang knows about the rear window moldings. Over
some time the moldings will eventually start to corrode and rot. If you've got a
Mustang and like to keep it looking sharp, aged window moldings do not do to much to help
the appearance. Over the years people have come up with different methods of
cleaning up and beautifying the moldings. None are permanent. You could go out
and buy some new rear windows, which we all know is very expensive. The moldings are
fixed permanently to the glass. I have heard some talk about a method of removing
the old moldings from the glass and replacing them with new ones. This is very
costly, negating the feasibility of ever doing it. So most of us do what we can to
help, some just let it go, giving up hope of a simple solution.
|
|
Well.... in steps
STEEDA. They have developed a molding cover
that adheres to and covers your old moldings. They have presented this product at a
cost effective price and with a simple method of removing the eye sores. We at
Stangnet decided to see how well and true these new molding covers would work.
On a nice cool Sunday here in the
Bay Area of California the boys met up at Charlies
Mustangs in San Jose. The technicians of Charlies Mustangs, Curt and Dave, were
there to provide us some assistance. Actually, the moldings were going on Curt's
car. (All of the local Stangnet boys also know him as Fiveofanatic.)
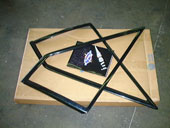
The first thing we did was opened up the
box and checked over the products. The moldings looked quite nice. They had a
new gloss shine to them, and were surprisingly thin. One would think being thin they
would be easily torn or broke, but actually they had a good solid feeling. The plastic
compound used was obviously of good quality. Supplied with the kit was one tube of
adhesive silicone (Now they ship two tubes, to assure a plentiful amount for adhesion).
Installation was going to be a
snap but we wanted to prepare the surfaces first. Dave took a good cleaner and
removed any dirt, oil, and debris from the old window moldings. He gave a once over
on the new moldings to prepare them as well.
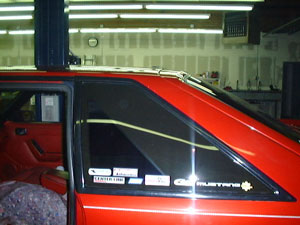
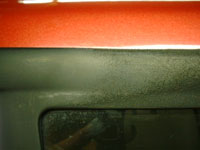
Next, we placed the moldings on
the car to see how well they would fit. They slipped right over without difficulty.
These moldings were made just right. Once permanantly in place your weren't
going to be able to tell that they were there.
After that, we applied a thick
bead of silicone down the middle of one molding. At first our thinking was spread it
out thin and cover all inner surfaces. We did this and placed it on the car, it
wouldn't stay fitted. We then realized that the best way was to have one big bead
down the center and just apply it like that and allow the pressure to force the bead out
and over the old molding. This worked perfect. It stayed in place and what a
nice fit too. To make sure that we got a good seal and that it would set up well,
Curt pulled out some duct tape. I cringed a little but he assured me that it would
be fine. The car was inside out of the sun and was moderately cool. [WARNING: DO NOT apply the duct tape or any other
tape to the surface of your car in the sun or heat. Please don't come running
to us when you can't get the tape off. This is a suggestion. What we are
saying is please just find your own method to make sure that the moldings set up
well.] We then proceeded to the other side and repeated the operation. After
an hour we removed the tape (carefully), which came off easily, and only a little bit of
glue remained which we removed with some glass cleaner. (We suggest leaving the tape on
longer, we just wanted to see how they looked.)
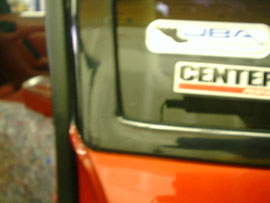
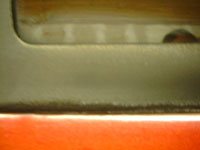
What a difference! The moldings
fit very well and the car looked great. The improvement was worth the effort.
So if your Stang seems to have the 'dry rot syndrome' on her rear moldings; the
method, cost, and product are worth it. We can see that these moldings will
last a long time; no foreseen problems. Even if it did start to come loose, all we would
have to do is apply some more adhesive silicone. We would like to stress that you
must use the adhesive type of silicone included in the package . At
first we thought is was JUST silicone, but it wasn't. ;)
Stangnet Staff
Stangnet Rating: Definitely 4th
Gear!
|