
Google charcoal canister for your year stang, you should find parts, vacuum routing and a wire harness with a solenoid, basic explanation is it regulates fuel tank vapors with manifold vacuum. You need to fix this.
You are using an out of date browser. It may not display this or other websites correctly.
You should upgrade or use an alternative browser.
You should upgrade or use an alternative browser.
Now It Will Not Rev Up/no Power
- Thread starter 90GTFOX22
- Start date
-
Sponsors (?)
@90GTFOX22
Charcoal canister plumbing - one 3/8" tube from the bottom of the upper manifold to the rubber hose. Rubber hose connects to one side of the canister solenoid valve. Other side of the solenoid valve connects to one side of the canister. The other side of the canister connects to a rubber hose that connects to a line that goes all the way back to the gas tank. There is an electrical connector coming from the passenger side injector harness near #1 injector that plugs into the canister solenoid valve. It's purpose is to vent the gas tank. The solenoid valve opens at cruse to provide some extra fuel. The canister is normally mounted on the passenger side frame rail near the smog pump pulley.
Connecting the gas tank vent line directly to the intake manifold will result in fuel vapor being constantly sucked into the intake manifold. There is unmetered fuel that the computer cannot adjust for. The result is poor idle and poor fuel economy.

It does not weigh but a pound or so and helps richen up the cruse mixture. It draws no HP & keeps the car from smelling like gasoline in a closed garage. So with all these good things and no bad ones, why not hook it up & use it?
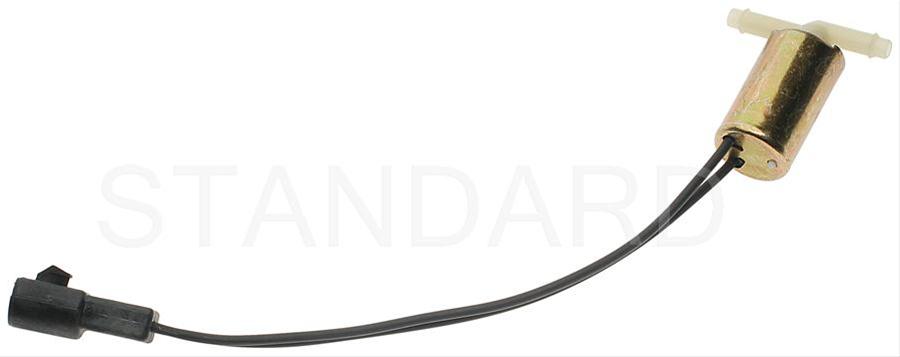
The purge valve solenoid connector is a dangling wire that is near the ECT sensor and oil filler on the passenger side rocker cover. The actual solenoid valve is down next to the carbon canister. There is about 12"-16" of wire that runs parallel to the canister vent hose that comes off the bottom side of the upper intake manifold. That hose connects one port of the solenoid valve; the other port connects to the carbon canister.
The purge valve solenoid should be available at your local auto parts store.
Purge valve solenoid:
The carbon canister is normally mounted on the passenger side frame rail near the smog pump pulley.
Carbon Canister:

Charcoal canister plumbing - one 3/8" tube from the bottom of the upper manifold to the rubber hose. Rubber hose connects to one side of the canister solenoid valve. Other side of the solenoid valve connects to one side of the canister. The other side of the canister connects to a rubber hose that connects to a line that goes all the way back to the gas tank. There is an electrical connector coming from the passenger side injector harness near #1 injector that plugs into the canister solenoid valve. It's purpose is to vent the gas tank. The solenoid valve opens at cruse to provide some extra fuel. The canister is normally mounted on the passenger side frame rail near the smog pump pulley.
Connecting the gas tank vent line directly to the intake manifold will result in fuel vapor being constantly sucked into the intake manifold. There is unmetered fuel that the computer cannot adjust for. The result is poor idle and poor fuel economy.
It does not weigh but a pound or so and helps richen up the cruse mixture. It draws no HP & keeps the car from smelling like gasoline in a closed garage. So with all these good things and no bad ones, why not hook it up & use it?
The purge valve solenoid connector is a dangling wire that is near the ECT sensor and oil filler on the passenger side rocker cover. The actual solenoid valve is down next to the carbon canister. There is about 12"-16" of wire that runs parallel to the canister vent hose that comes off the bottom side of the upper intake manifold. That hose connects one port of the solenoid valve; the other port connects to the carbon canister.
The purge valve solenoid should be available at your local auto parts store.
Purge valve solenoid:
The carbon canister is normally mounted on the passenger side frame rail near the smog pump pulley.
Carbon Canister:
Definitely a big vacuum leak... I had a similar problem when one of the caps on the metal line next to the carbon canister feed deteriorated enough to be ineffective. I had an idle that ran at 1000 RPM no matter what I did to try and fix it.Well I found that the hose running from the purge solenoid to the canister is missing. Hopefully this will fix some problems. I would imagine this is a big vacuum leak?
It's fixed! Thank you guys for all the help! Much appreciated. I do still have a few things to do and some questions. So I replaced my distributor but I kinda messed up. I used to run timing at 14* well now I could only get 10* because I cant get my dist to turn anymore.
mikestang63
SN Certified Technician
It's fixed! Thank you guys for all the help! Much appreciated. I do still have a few things to do and some questions. So I replaced my distributor but I kinda messed up. I used to run timing at 14* well now I could only get 10* because I cant get my dist to turn anymore.
reinstall the distributor with the TFI moved so you can add more timing. As long as the rotor is pointing in the same direction as when you removed it it really doesnt matter the location of the TFI, except in your case where you dont have enough room to rotate it.
You are 1 tooth off and it won't hurt anything except you can't turn the distributor enough to set the timing at 14°.It's fixed! Thank you guys for all the help! Much appreciated. I do still have a few things to do and some questions. So I replaced my distributor but I kinda messed up. I used to run timing at 14* well now I could only get 10* because I cant get my dist to turn anymore.
Putting the distributor back in and setting the timing.
Revised 15-Apr-2016 to add fix for TFI hitting the thermostat housing while trying to set the base timing at 14°.
You can forget about anything beyond this point if you don't have access to a timing light. You will never get the timing set right without one.
Note: If you don't have access to a timing light, most of the larger auto parts stores will rent or loan one if you have a credit card or leave a cash deposit.
Putting the distributor back in is fairly simple. Pull #1 sparkplug, put your finger in the sparkplug hole, crank the engine until you feel compression. Then line up the TDC mark on the balancer with the pointer on the engine block.
The distributor starts out with the #1 plug wire lined up at about 12:00 with you facing it. Align the rotor to about 11:00, since it will turn clockwise as it slides into place.
Align the distributor rotor up with the #1 position marked on the cap, slide the distributor down into the block, (you may have to wiggle the rotor slightly to get the gear to engage) and then note where the rotor is pointing.
If it still lines up with #1 position on the cap, install the clamp and bolt. If not, pull it out and turn 1 tooth forwards or backwards and try again. Put the #1 spark plug back in and tighten it down, put the clamp on the distributor, but don't tighten it too much, as you will have to move the distributor to set the timing. Note that there is no such thing as one tooth off on a 5.0 Mustang if you follow the spark plug wire order on the distributor cap. If it doesn't align perfectly with #1 position, you can turn the distributor until it does. The only problem is that if you are too far one way or the other, you can't turn the distributor enough to get the 10-14 degree optimum timing range. If the TFI prevents the distributor from being turned enough to get 14°, there is a simple fix. Pull the distributor out and turn the rotor 1 tooth counterclockwise Don't move the wires from the positions shown on the cap on fuel injected engines!!!! The #1 position cast into the cap MUST have the spark plug wire for #1 cylinder in it. Do it differently and the timing for the fuel injectors will be off. The computer uses the PIP sensor to time injector operation by sensing the wide slot in the PIP sensor shutter wheel. If the injector timing of #1 and the firing of #1 do not occur at the right time, the injector timing for all other cylinders will be affected.
Setting the timing:
Paint the mark on the harmonic balancer with paint -choose 10 degrees BTC or 14 degrees BTC or something else if you have NO2 or other power adder. I try to paint TDC red, 10 degrees BTC white and 14 degrees BTC blue.
10 degrees BTC is towards the drivers side marks.
Note: setting the timing beyond the 10 degree mark will give you a little more low speed acceleration. BUT you will need to run 93 octane to avoid pinging and engine damage. Pinging is very hard to hear at full throttle, so it could be present and you would not hear it.
Simplified diagram of what it looks like. Not all the marks are shown for ease of viewing.
ATC ' ' ' ' ' ' ' ' ' '!' ' ' ' ' ' ' ' ' ' BTC
---------------- > Direction of Rotation as viewed standing in front of the engine.
The ' is 2 degrees.
The ! is TDC
The ' is 10 degrees BTC
Set the timing 5 marks BTC. Or if you prefer, 5 marks towards the driver's side to get 10 degrees.
To get 14 degrees, set it 7 marks BTC. Or if you prefer, 7 marks towards the driver's side to get 14 degrees.
The paint marks you make are your friends if you do it correctly. They are much easier to see than the marks machined into the harmonic balancer hub.
At this point hook up all the wires, get out the timing light. Connect timing light up to battery & #1 spark plug. Then start the engine.
Remove the SPOUT connector (do a search if you want a picture of the SPOUT connector) It is the 2 pin rectangular plug on the distributor wiring harness. Only the EFI Mustang engines have a SPOUT. If yours is not EFI, check for a SPOUT: if you don’t find one, skip any instructions regarding the SPOUT
Warning: there are only two places the SPOUT should be when you time the engine. The first place is in your pocket while you are setting the timing and the second is back in the harness when you finish. The little bugger is too easy to lose and too hard to find a replacement.
Start engine, loosen distributor hold down with a 1/2" universal socket. Shine the timing light on the marks and turn the distributor until the mark lines up with the edge of the timing pointer. Tighten down the distributor hold down bolt, Replace the SPOUT connector and you are done.
The HO firing order is 1-3-7-2-6-5-4-8.
Non HO firing order is 1-5-4-2-6-3-7-8

NoCould I just hold the rotor in place. Pick up the distributor a little bit and turn the housing?
Ahhhh... I feel like I'm back to square one. So I had the problem of not being able to turn my distrubutor anymore to advance timing. So I decided to try and fix it. Found TDC, pointed rotor at the 1 position and reinstalled. Timed to 14* and went for a drive. Same  , WOT the car just falls on its face at like 3-3500 rpm. Will rev past that in neutral and if I ease into it like 1/4 throttle it will go past as well. Any ideas?
, WOT the car just falls on its face at like 3-3500 rpm. Will rev past that in neutral and if I ease into it like 1/4 throttle it will go past as well. Any ideas?High speed miss on a warm engine
Revised 7 Nov-2016 to add PIP sensor as possible problem and dumping the codes to help determine if it is the TFI or PIP.
The TFI module mounted on the distributor is one of the culprits for a high speed miss on a warm engine. The other suspect is the PIP sensor inside the distributor. If the problem does not occur when the engine is cold, the TFI module or PIP is definitely suspect. Dumping the codes may help determine which one it is. You may need a special socket to remove the TFI module, but most auto parts stores will have one for $5-$7.
Be sure to use plenty of the heat sink grease on the new TFI and clean the old grease off the distributor.

See Automotive Tools Specialty | Auto Mechanic & Technician Diagnostic, Testing Equipment | Thexton
diagram courtesy of Tmoss & Stang&2Birds

Revised 7 Nov-2016 to add PIP sensor as possible problem and dumping the codes to help determine if it is the TFI or PIP.
The TFI module mounted on the distributor is one of the culprits for a high speed miss on a warm engine. The other suspect is the PIP sensor inside the distributor. If the problem does not occur when the engine is cold, the TFI module or PIP is definitely suspect. Dumping the codes may help determine which one it is. You may need a special socket to remove the TFI module, but most auto parts stores will have one for $5-$7.
Be sure to use plenty of the heat sink grease on the new TFI and clean the old grease off the distributor.
See Automotive Tools Specialty | Auto Mechanic & Technician Diagnostic, Testing Equipment | Thexton
diagram courtesy of Tmoss & Stang&2Birds
Last edited:
Appreciate the input. I have a brand new tfi and distributor in. Ran good until I decided to fix my timing issueHigh speed miss on a warm engine
Revised 7 Nov-2016 to add PIP sensor as possible problem and dumping the codes to help determine if it is the TFI or PIP.
The TFI module mounted on the distributor is one of the culprits for a high speed miss on a warm engine. The other suspect is the PIP sensor inside the distributor. If the problem does not occur when the engine is cold, the TFI module or PIP is definitely suspect. Dumping the codes may help determine which one it is. You may need a special socket to remove the TFI module, but most auto parts stores will have one for $5-$7.
Be sure to use plenty of the heat sink grease on the new TFI and clean the old grease off the distributor.

See Automotive Tools Specialty | Auto Mechanic & Technician Diagnostic, Testing Equipment | Thexton

diagram courtesy of Tmoss & Stang&2Birds

So does the problem happen with a cold engine?Appreciate the input. I have a brand new tfi and distributor in. Ran good until I decided to fix my timing issue
Back to square 1 again...
Dump the codes to see what you get.
Dump codes sticky
Look at the top of the 5.0 Tech forum where the sticky threads are posted. One of them is how to dump the computer codes. Codes may be present even if the CEL (Check Engine Light) isn’t on. You don’t need a code reader or scanner – all you need is a paper clip, or if your lady friend has a hair pin, that will do the job.
I highly suggest that you read it and follow the instructions to dump the codes. http://www.stangnet.com/mustang-forums/threads/how-to-pull-codes-from-eec4.889006/
Similar threads
Digital Tuning
FAST efi frustration.
- Replies
- 11
- Views
- 594
- Replies
- 26
- Views
- 1K
- Replies
- 6
- Views
- 788
- Replies
- 22
- Views
- 1K