1976 Cobra build

They are in Christine. It was a v6 /auto and now has a 302 /T5. I have all 3 major brands on different cars or at different times. The hookers blow the others away. The hookers are the best fitting headers of the bunch. I have 2 brand new sets of hedmans sitting here now and am saving up for hookers for the Mach I. The hedmans are just not worth it after using the hookers. They dropped right in. No trimming of the strut rod. No hammering at the steering shaft. They just fit.
Well that sounds pretty reassuring! Do you have any pics that I could look at?
Thanks
 
  • Sponsors (?)


My dad saw your thread and we both liked the work you did and planned on copying it. My main concern was the manifolds being restrictive. My engine is a 302 .30 over. It has a mild cam. I have an edelbrock 289 series intake and a 600 cfm edelbrock carb. I have AFR 165cc Aluminum heads. My concern was the manifold suffocating the heads. I was also wondering if a stock header replacement for a 65 would work in the place of the manifolds.
Yeah, with that engine the manifolds will be restrictive for sure. 65 mustang headers don't fit, 65 mustang HiPo manifold will also not fit. Fox shortys don't fit. As I said the only product that could(!) fit are the JBA mid-length. But I think with the experience @IICrew has with the hookers, and because they are in the same $$$ range as the JBAs I would not start messing with a custom setup. I had the manifolds already laying around and with my engine that is setup for low end torque, I didn't want to spend money on that... at least at that time.
 
I do not have engine bay pics of the hookers yet. The pics in my build thread are the old blackjacks. They fit pretty good but I had to use a bfh to get clearance at the steering shaft. Fitment wise the two sets are very similar except at the steering shaft. The hookers went in without any adjustments. They hug the block closer vs the blackjacks. I do not know what gauge they are both made of but my set of blackjacks are noticeably lighter. Where the pipe is welded to the flange at the head is thinner on the blackjacks. Not much sealing surface. That mounting flange is also thinner. I had a hard time keeping them sealed there. I used regular, double layer steel, then double layer copper gaskets. I always had the header tick. It was better with the copper but still there. I have a ground down 3/8 wrench I carried with me all the time to snug them up.

The hookers sealed fine using the copper double layer gaskets. The only problem I had using them and the double layered gaskets was needing longer header bolts. I have put about 2,000 miles on the hookers and have not needed to re-tighten the header bolts. I had to do it repeatedly on the blackjacks.

The hedmans I have were new. One set still in the box. They came with project II's I picked up along the way. One set is on the Mach I now. The last posts in that build thread covers the problems they presented. I know others have used them with success. Both of my sets are bent wrong out of the box. The are parallel at the flange and collector but should have a mild kick down. As is they are too close to the floor and crossmember. Once the collector flange is on there is not enough room for a pipe to clear the crossmember. That car is a stock 302/4 speed. I could try to bend them downward but then I still have the one pipe going under the front crossmember. It would probably be okay on the Mach I as it sits higher but I would certainly smash it on Christine as she sits lower.
 
  • Like
Reactions: 1 users
Reading about the sealing issues @IICrew has... you do not have them with manifolds. I could not believe, that they are mounted without gasket. A friend said just use a little bit high temp silicone. It works really well. Because I bought a new set of this 65 specific locking-sheet-metal-things, I have no issue with loose bolts or leaks compared to my experience with headers on my 65 coupe:
1668082789641.jpeg
 
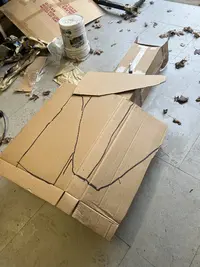
Cowl is apart. Patch is made. Will be welding patch in tomorrow. This was me and my dad working on it today.
 

Attachments

  • E8F5EC29-D828-463D-B1A9-F3A4E2AF6CC4.jpeg
    E8F5EC29-D828-463D-B1A9-F3A4E2AF6CC4.jpeg
    610.1 KB · Views: 78
  • AEA5FD53-94D6-4C1E-8CEB-1CA6D6B8EC4F.jpeg
    AEA5FD53-94D6-4C1E-8CEB-1CA6D6B8EC4F.jpeg
    541.1 KB · Views: 73
  • 105F885B-083D-4796-B497-22F792348CA3.jpeg
    105F885B-083D-4796-B497-22F792348CA3.jpeg
    677.3 KB · Views: 69
  • FBD2D35E-9797-499F-85C5-7E34175DE9A4.jpeg
    FBD2D35E-9797-499F-85C5-7E34175DE9A4.jpeg
    619.1 KB · Views: 76
  • D2FB0F30-E2A1-448C-9DC1-F0F4A7DE68F0.jpeg
    D2FB0F30-E2A1-448C-9DC1-F0F4A7DE68F0.jpeg
    609.2 KB · Views: 65
  • Like
  • Loved It!
Reactions: 4 users
Wow look at that cowl getting peeled open!
Getting after it for sure!

Were you able to save the windshield?
Is the spot welded flange intack or does it need patching too?
Will you be able to seal up the back side?
Doesn’t attach to A .pillers right?
Can we have more pictures? including back sides of both upper and lower cowl?

Dads the Man! helping out on this! Old Guys Rule!

I’m gonna get to do this. but hard to do with engine in I bet.


Step Right Up.
Guess the number of drilled spot welds and win a prize;

I Guess 108.
 
  • Like
Reactions: 1 user
Taping off all the glass. The windshield I didn’t bother saving as it had a big crack up the middle already. I will have to count the spot welds and get more pics of the cowl.
 

Attachments

  • BA5837EE-5D5C-4CB3-900A-909EB6662373.jpeg
    BA5837EE-5D5C-4CB3-900A-909EB6662373.jpeg
    592.7 KB · Views: 57
  • 6C8DACC6-8699-4A43-A3D4-B1325657F209.jpeg
    6C8DACC6-8699-4A43-A3D4-B1325657F209.jpeg
    564.9 KB · Views: 56
  • FA4849E2-C893-4890-BE36-D0CEA42E7395.jpeg
    FA4849E2-C893-4890-BE36-D0CEA42E7395.jpeg
    484.1 KB · Views: 55
  • 97CC62AA-2EF7-42C4-A8F2-7AC0279631C4.jpeg
    97CC62AA-2EF7-42C4-A8F2-7AC0279631C4.jpeg
    387.4 KB · Views: 65
  • Like
Reactions: 3 users
Wow look at that cowl getting peeled open!
Getting after it for sure!

Were you able to save the windshield?
Is the spot welded flange intack or does it need patching too?
Will you be able to seal up the back side?
Doesn’t attach to A .pillers right?
Can we have more pictures? including back sides of both upper and lower cowl?

Dads the Man! helping out on this! Old Guys Rule!

I’m gonna get to do this. but hard to do with engine in I bet.


Step Right Up.
Guess the number of drilled spot welds and win a prize;

I Guess 108.
The windsheild had a big crack already so I didn’t save it. The flanges were really clean so I won’t have to repair them. It attaches to the a pillars more towards the bottom. Ill be able to seal the bottom but not the bottom of the top piece once its welded on.
Ill get more pics
With engine with be really difficult I think. If you have an interior in your car it would be even tougher.
 
  • Like
Reactions: 1 user
My dad gpt the patch all welded in. Tomorrow we have a few more patches to do. Then I go back to school. Will have to wait until next weekend to paint it.
 

Attachments

  • 5BFE44D1-21D7-41BE-A9DA-9C9C529075FD.jpeg
    5BFE44D1-21D7-41BE-A9DA-9C9C529075FD.jpeg
    580.1 KB · Views: 58
  • 54CA8E2B-BEB7-4D09-8D0A-23BC7AD3A370.jpeg
    54CA8E2B-BEB7-4D09-8D0A-23BC7AD3A370.jpeg
    621.2 KB · Views: 54
  • FA1C4C94-13B5-4D80-AF10-31330986623F.jpeg
    FA1C4C94-13B5-4D80-AF10-31330986623F.jpeg
    495.4 KB · Views: 54
  • 2C99582A-B0C8-422F-B212-38B86AE52D89.jpeg
    2C99582A-B0C8-422F-B212-38B86AE52D89.jpeg
    662.9 KB · Views: 58
  • 30D0EDBD-647E-49AF-914A-DED106C2E066.jpeg
    30D0EDBD-647E-49AF-914A-DED106C2E066.jpeg
    442.5 KB · Views: 60
  • 5027D705-F0FC-45B2-9DB5-8D1637F2D3C0.jpeg
    5027D705-F0FC-45B2-9DB5-8D1637F2D3C0.jpeg
    554.1 KB · Views: 53
  • 2C4F6DF3-C1FF-488E-B807-A62988747E90.jpeg
    2C4F6DF3-C1FF-488E-B807-A62988747E90.jpeg
    587.2 KB · Views: 58
  • 16C1415B-EDF6-4E9D-B23A-2A2AE870F675.jpeg
    16C1415B-EDF6-4E9D-B23A-2A2AE870F675.jpeg
    655.3 KB · Views: 62
  • D253DB99-CE73-41DC-A731-3DFD8EA023F9.jpeg
    D253DB99-CE73-41DC-A731-3DFD8EA023F9.jpeg
    627.7 KB · Views: 64
  • Like
  • Loved It!
Reactions: 3 users
My dad got the rest of the patches in today. He did an amazing job. Not many people would bother with a Mustang II. He convinced me to fix it.
 

Attachments

  • D80B5B74-D453-4785-BE99-177ECF2A3DE8.jpeg
    D80B5B74-D453-4785-BE99-177ECF2A3DE8.jpeg
    634.8 KB · Views: 49
  • C2CC2E52-01B2-4E82-9BBF-FD014A089788.jpeg
    C2CC2E52-01B2-4E82-9BBF-FD014A089788.jpeg
    556.2 KB · Views: 50
  • 8DA5020F-460C-475C-9262-1DE24D07EBEA.jpeg
    8DA5020F-460C-475C-9262-1DE24D07EBEA.jpeg
    594.5 KB · Views: 62
  • FAAC09BB-6CB1-4E96-A56C-007AC7A19FA1.jpeg
    FAAC09BB-6CB1-4E96-A56C-007AC7A19FA1.jpeg
    633.7 KB · Views: 56
  • BB9DBDC2-EAE2-409E-BAE0-5495EDDD9F03.jpeg
    BB9DBDC2-EAE2-409E-BAE0-5495EDDD9F03.jpeg
    660 KB · Views: 52
  • 82D2B068-E06B-44E4-9693-253808B24EE3.jpeg
    82D2B068-E06B-44E4-9693-253808B24EE3.jpeg
    557.3 KB · Views: 57
  • C5A2009D-CFE5-4001-B38B-31485269486B.jpeg
    C5A2009D-CFE5-4001-B38B-31485269486B.jpeg
    625 KB · Views: 64
  • 55C12CB2-4813-4F48-89FF-F1538E3D01BA.jpeg
    55C12CB2-4813-4F48-89FF-F1538E3D01BA.jpeg
    587 KB · Views: 58
  • 2C09D59D-90EF-4819-951E-911B8E692F41.jpeg
    2C09D59D-90EF-4819-951E-911B8E692F41.jpeg
    630.4 KB · Views: 53
  • CEC8DD16-9EDD-47C0-9149-88062D17E2E5.jpeg
    CEC8DD16-9EDD-47C0-9149-88062D17E2E5.jpeg
    617.3 KB · Views: 51
  • Like
Reactions: 1 users
Nice work! Because you closed the openings for heater/air, are you thinking about closing the "grille" in the cowl vent, too?
No I was thinking of using a modern box. My dad has a 67 cougar and we used a box from old auto air. With those boxes they close up the vents. I was going to use the factory stuff and even bought a factory A/C system which was a fortune but I decided I would want to stick with the new box as it is more efficient and about 1/3 of the size. The holes at that point were just where water would collect so I closed them. I will be keeping the grille though! I don't really think they ever look right without them.
 
  • Like
Reactions: 3 users
All painted. Tomorrow I will seam seal it and then put a final coat.
Also my dad worked on repairing the top plate.
 

Attachments

  • 7FD75494-BF46-482D-A473-F128BBB7C5BE.jpeg
    7FD75494-BF46-482D-A473-F128BBB7C5BE.jpeg
    604.3 KB · Views: 46
  • 975223CC-FA26-47DC-8376-CBF031E2F73F.jpeg
    975223CC-FA26-47DC-8376-CBF031E2F73F.jpeg
    589.2 KB · Views: 36
  • 807F56A6-DAD8-432A-B233-D45DF379A597.jpeg
    807F56A6-DAD8-432A-B233-D45DF379A597.jpeg
    563.3 KB · Views: 40
  • 5FC99C66-AF81-4108-B531-895EAD276AE9.jpeg
    5FC99C66-AF81-4108-B531-895EAD276AE9.jpeg
    599.9 KB · Views: 38
  • 26C97B40-6822-4DAB-8C73-7B1FA026DBF5.jpeg
    26C97B40-6822-4DAB-8C73-7B1FA026DBF5.jpeg
    528 KB · Views: 34
  • 10ACB485-0159-4B3B-A0E8-122B278DF5E4.jpeg
    10ACB485-0159-4B3B-A0E8-122B278DF5E4.jpeg
    480 KB · Views: 41
  • 58A6BB64-6E4D-4CDA-9858-29871F8EE7A1.jpeg
    58A6BB64-6E4D-4CDA-9858-29871F8EE7A1.jpeg
    690.4 KB · Views: 46
  • 38C3EDBB-1B47-4405-84C5-31E4C7AE58C9.jpeg
    38C3EDBB-1B47-4405-84C5-31E4C7AE58C9.jpeg
    522.5 KB · Views: 43
  • 64789C87-2042-41CD-825E-C2082A92B635.jpeg
    64789C87-2042-41CD-825E-C2082A92B635.jpeg
    532.5 KB · Views: 39
  • 04AEA7DE-EBCC-43CD-B424-859E1519F331.jpeg
    04AEA7DE-EBCC-43CD-B424-859E1519F331.jpeg
    475.1 KB · Views: 40
  • Like
  • Loved It!
Reactions: 3 users
Today I did the seam sealer. Then I did another two coats of epoxy primer on top of the sealer. My dad finished the repairs on the top plate. I painted that in epoxy as well.
 

Attachments

  • 096B6505-B867-403B-8714-65BFA3FC9745.jpeg
    096B6505-B867-403B-8714-65BFA3FC9745.jpeg
    660.9 KB · Views: 34
  • 2A9738CF-7513-4971-870D-65A26A40EB34.jpeg
    2A9738CF-7513-4971-870D-65A26A40EB34.jpeg
    488.9 KB · Views: 29
  • 5A5CF1D8-909A-48BA-9215-62A53CB79A27.jpeg
    5A5CF1D8-909A-48BA-9215-62A53CB79A27.jpeg
    683.5 KB · Views: 32
  • 55695D24-F7E6-4435-97F2-B433BC2B9388.jpeg
    55695D24-F7E6-4435-97F2-B433BC2B9388.jpeg
    462 KB · Views: 33
  • 98D9EBFC-88FA-4E4A-9805-26273FCA5C06.jpeg
    98D9EBFC-88FA-4E4A-9805-26273FCA5C06.jpeg
    488.2 KB · Views: 29
  • 82EB8FE9-BFA7-4744-9350-BA42FBEEA49A.jpeg
    82EB8FE9-BFA7-4744-9350-BA42FBEEA49A.jpeg
    520.1 KB · Views: 27
  • 3FA51D91-AEEB-47C4-B321-B5A74D090692.jpeg
    3FA51D91-AEEB-47C4-B321-B5A74D090692.jpeg
    489.3 KB · Views: 29
  • F86EF692-2883-4524-8457-F00AC9AF8862.jpeg
    F86EF692-2883-4524-8457-F00AC9AF8862.jpeg
    495.9 KB · Views: 35
  • FB73B7BE-69BE-4BC0-9489-1065E726E80F.jpeg
    FB73B7BE-69BE-4BC0-9489-1065E726E80F.jpeg
    496.8 KB · Views: 31
  • AD55CB78-691D-445C-A0E0-588A6A0AAA76.jpeg
    AD55CB78-691D-445C-A0E0-588A6A0AAA76.jpeg
    520.9 KB · Views: 33
  • Like
Reactions: 1 users