|
Home > Articles/Tech |
|
Home > Articles/Tech |
|
Recovering Your MACH 460 Speaker Covers by Sean Foushee aka TxFrog1999
Have you ever wanted to spice up the interior of
your Mustang, but didn't want to paint interior pieces or spend hundereds
of dollars on expensive moldings and replacement parts? Within this
article I'm going to show just how easy it is for you to recover the MACH
460 speaker covers. This mod is fairly simple, does not take more than a
few hours, and best of all is inexpensive. As for the results, well take a
look:
WARNING: I am not responsible for mistakes made while attempting this mod due to ignorance, lack of patience, or simply following my directions as though they were written by GOD.
Before we begin I must mention that while my wife is into knitting and crochet I had absolutely no experience in cloth or upholstery work before attempting this mod, it was the product of eyeball engineering. So I guess what I'm trying to say is if I can do it, you can do it. Now lets talk a bit about the cloth we need. Ford, or their distributor, uses a thin semitransparent and porous fabric to cover the speakers. What I found to be the closest match without buying expensive speaker mesh is athletic mesh used to make athletic shorts. So during a trip to the fabric store with my wife I decided to look around and see if they had a close match. Sure enough in the athletic fabric section (didn't even know they had a section named that!) I found a match. Word to the wise, I have a Performance Red Vert, and it was hard to find a cloth that matched the paint, so I suggest either asking the cashier if you can take the sample outside to compare or you have better have a good eye. Also worthy to mention is the sun's pesky tendency to bleach or dye colored fabric. UV radiation will discolor most cloth like that HS graduation tassel that's been attached to your rear view mirror for who knows how long. Other tools and items needed to complete this mod are:
Note: The
adhesive is to tack down the new cloth and while you can use Elmer's Glue
it takes a long time to dry, so I used 3M's 77 Spray Adhesive. This stuff
is great, but a pain to remove from your fingers.
First Step is to remove the tweeter cover from the
tweeter enclosure. To do this simply pull on the cover (not the tweeter
box), it may require a little force but it will come off. If you're stuck
and the cover won't come loose it is probably due to the original glue
having adhered itself to the tweeter enclosure, so carefully pry it off
using a flathead screwdriver.
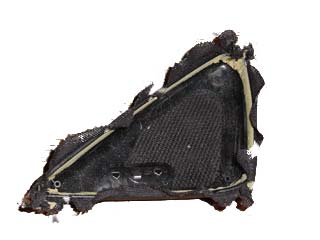
Next, go inside or where ever you have set up shop
and carefully remove the original mesh from the inside of the
cover.
After you have separated the original mesh from
the hardened glue remove the MACH 460 Emblem by prying the three prongs
(like how you open one of those large manila envelopes). Make sure to keep
the Emblem in a safe place.
Now remove the original mesh from the cover. It is
held on by a tacky adhesive, make sure not to touch the adhesive because
we want to reuse it to apply our new cloth later.
What I did to make things easier was to lay the
fabric I bought over the exposed cover and smooth out the front lines
before I cut the fabric.
After you have cut the fabric to fit around the
cover go back and make sure there are no creases or bubbles. Apply the
adhesive to the back of the cover along the edges that was used to glue
the original mesh and simply fold over your excess fabric. Make sure as
you fold the fabric that you don't get adhesive on the front of the new
mesh and that you continuously pull and tug at the edges to get all of the
creases out (the fabric should stretch enough to allow you to mold it
around the corners). If you are using the 3M Adhesive I mentioned earlier
it will dry quickly, but you will have enough time to reposition the mesh
if you make a mistake. Let the cover dry for about 5-10 minutes then
reattach the MACH 460 Emblem using a knife to cut out the mesh covering
the original holes for mounting the emblem.
Last thing to do is reinstall your covers and show
them off to all of your fellow stangers!
If you own a Convertible Like I do you can also do
the same thing to the rear speaker covers.
Click Here scroll down
to the bottom of the screen and follow the instructions for removing the
rear seat and side moldings. Pop out the top and bottom covers and repeat
the instructions for each. I found the rear cover far easier to do than
the front ones.
So that's it! Pretty simple mod and in all the total cost was under $5. If you are attempting to do this mod and have come across a problem or have completed this mod I'd love to hear from you, oh and send pics :-) Sean Foushee
|