
Ok so after reading a RETARDED amount of threads all over the interwebs, I figured I'd tackle this mod.
Installation of a Early 90's model 2 speed Taurus electric fan on my 90 Notchback.
Parts:
Taurus Fan:

Hayden Fan Controller:

75 Amp Relay :
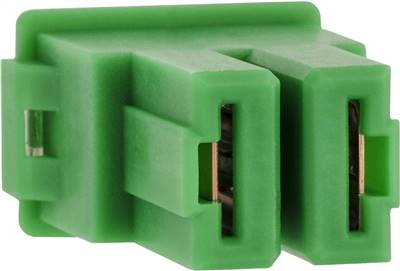
40 Amp female fuse:
Radiator zip ties:

10ft of 8 gauge wire
10ft of 12 gauge wire
Butt splices
Ring Terminals
Zip Ties
Electrical tape
Ok so I picked up my taurus fan for 28 bucks at our local wrench a part. The weekend before I picked up my 3g alternator for 28 bucks also.
Anyway, Here is my horrible wiring diagram, with my chicken scratch writing. Before I did anything, I wrote this down.

Had a few spots where I just couldn't figure out. The write ups that are on the net vary so much, that you don't know who is right/wrong blah blah blah. So after a call and
long chat with a professional who doesn't do this for a living, finally got things ironed out. So first I did the wiring for the fan itself.

Installed my 40 amp fuse:


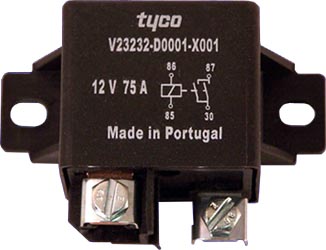
Installed my 75 amp Relay:

Grounded the relay:


Now that that's all installed, time to rip out the old stuff. Pulled out the mechanical fan/clutch/shroud and overflow bottle. Reinstalled the 4 water pump bolts back
into the pulley.
Like every other write up, most talked about using weather stripping. I went the same route. 3/8 x 1/2 roll of weather stripping. I'm going to redo
mine. I think that I can do something better. But this will get me by for right now. The bottom of the fan fit's nicely into the bottom (factory) shroud
clips. But leaves you scratching your head for securing the top. Some write up's had you flip the fan upside down, and trim this piece off and
grind here. I didn't want to do that. So I mounted it the way it was stock. Went to the parts store and got some radiator pull through zip ties for the top
install. Talk about a pain in the ass. I would strongly recommend that you pull your radiator support arms (that hold the radiator in place) off so you can
lean the radiator and fan assembly forward so you can tighten up the retainers. So I installed the fan:


The picture above also show's where I mounted my controller. Figured I'd keep it there, that way I could adjust it if need be. Didn't really
have any other place to put it. All in all it worked out pretty good.
Fan installed:

For the overflow bottle, I still need to work on that. But for the time being I have two of the radiator pull through ties holding it on to the radiator. Hopefully
I'll make something out of sheet metal that will support it on the bottom.
The controller install was pretty self explanatory, I chose to only use the high speed side on the taurus fan. Flow's just fine and keep's my car @ 190 degree's with the
a/c on max and it's 105 outside. Pay attention to color wire's and look really hard at the factory wiring and where you going to tap into. I ended up wiring the fan the wrong
way and it was blowing air into the radiator instead of pulling. I missed the iddy biddy red strip on the wire. I tried to shrink wrap all my connections, some of them I just didn't
have the right size, so I made due with what I had. One note, as far as how to wire up the controller's 12v constant hot, and 12v "KEY ON" I didn't want my fan to run after I have
shut the car off. Things happen and mechanical/electrical parts can crap out. So I wired my controller's 12v constant hot and 12v "KEY ON" hot together to a 12v "KEY ON" source.
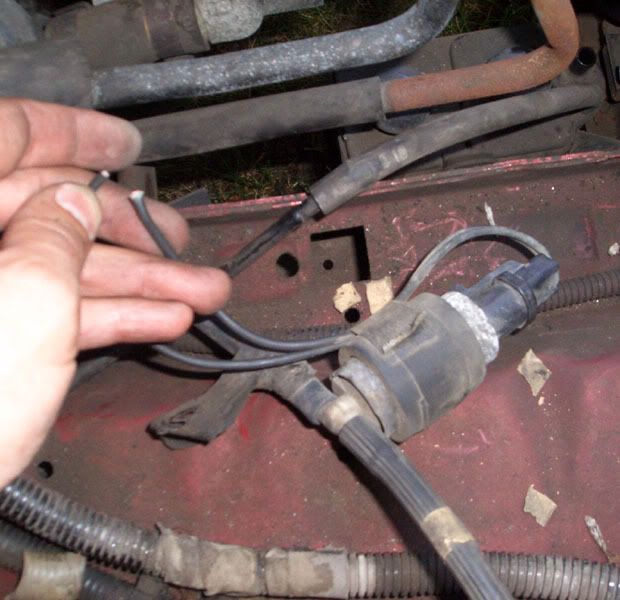
Which ended up being the PURGE SOLENOID connector. Both wire's are black so your going to have to figure out which wire is hot and which is ground.
Picture of purge solenoid (borrowed from another forum) which is located on the passenger side below the airbox, and inboard of the frame rail. you can't miss it.
The rest is a piece of cake. hope this helps, like I said there are SOOOOOO many write up's out there, and it can get kinda overwhelming on which one to do.
Any questions/suggestions lemme know. This is a rough install. I want to dress the wiring up better, seal the shroud on the radiator better....so by no means is
this completely done, but then again when is our mustang projects EVER done! ;D
Installation of a Early 90's model 2 speed Taurus electric fan on my 90 Notchback.
Parts:
Taurus Fan:
Hayden Fan Controller:
75 Amp Relay :
40 Amp female fuse:
Radiator zip ties:
10ft of 8 gauge wire
10ft of 12 gauge wire
Butt splices
Ring Terminals
Zip Ties
Electrical tape
Ok so I picked up my taurus fan for 28 bucks at our local wrench a part. The weekend before I picked up my 3g alternator for 28 bucks also.
Anyway, Here is my horrible wiring diagram, with my chicken scratch writing. Before I did anything, I wrote this down.
Had a few spots where I just couldn't figure out. The write ups that are on the net vary so much, that you don't know who is right/wrong blah blah blah. So after a call and
long chat with a professional who doesn't do this for a living, finally got things ironed out. So first I did the wiring for the fan itself.
Installed my 40 amp fuse:
Installed my 75 amp Relay:
Grounded the relay:
Now that that's all installed, time to rip out the old stuff. Pulled out the mechanical fan/clutch/shroud and overflow bottle. Reinstalled the 4 water pump bolts back
into the pulley.
Like every other write up, most talked about using weather stripping. I went the same route. 3/8 x 1/2 roll of weather stripping. I'm going to redo
mine. I think that I can do something better. But this will get me by for right now. The bottom of the fan fit's nicely into the bottom (factory) shroud
clips. But leaves you scratching your head for securing the top. Some write up's had you flip the fan upside down, and trim this piece off and
grind here. I didn't want to do that. So I mounted it the way it was stock. Went to the parts store and got some radiator pull through zip ties for the top
install. Talk about a pain in the ass. I would strongly recommend that you pull your radiator support arms (that hold the radiator in place) off so you can
lean the radiator and fan assembly forward so you can tighten up the retainers. So I installed the fan:
The picture above also show's where I mounted my controller. Figured I'd keep it there, that way I could adjust it if need be. Didn't really
have any other place to put it. All in all it worked out pretty good.
Fan installed:
For the overflow bottle, I still need to work on that. But for the time being I have two of the radiator pull through ties holding it on to the radiator. Hopefully
I'll make something out of sheet metal that will support it on the bottom.
The controller install was pretty self explanatory, I chose to only use the high speed side on the taurus fan. Flow's just fine and keep's my car @ 190 degree's with the
a/c on max and it's 105 outside. Pay attention to color wire's and look really hard at the factory wiring and where you going to tap into. I ended up wiring the fan the wrong
way and it was blowing air into the radiator instead of pulling. I missed the iddy biddy red strip on the wire. I tried to shrink wrap all my connections, some of them I just didn't
have the right size, so I made due with what I had. One note, as far as how to wire up the controller's 12v constant hot, and 12v "KEY ON" I didn't want my fan to run after I have
shut the car off. Things happen and mechanical/electrical parts can crap out. So I wired my controller's 12v constant hot and 12v "KEY ON" hot together to a 12v "KEY ON" source.
Which ended up being the PURGE SOLENOID connector. Both wire's are black so your going to have to figure out which wire is hot and which is ground.
Picture of purge solenoid (borrowed from another forum) which is located on the passenger side below the airbox, and inboard of the frame rail. you can't miss it.
The rest is a piece of cake. hope this helps, like I said there are SOOOOOO many write up's out there, and it can get kinda overwhelming on which one to do.
Any questions/suggestions lemme know. This is a rough install. I want to dress the wiring up better, seal the shroud on the radiator better....so by no means is
this completely done, but then again when is our mustang projects EVER done! ;D
 but I replaced my controller with the Hayden two-speed setup, and this time I didn't use the extra relay. So far so good, I have two speeds and I also ran a green LED next to the water temp gauge. That way I can tell when the fan is on.

") Either way, I can override it if need be. If it fails, I'm done with Hayden.
Either way, I can override it if need be. If it fails, I'm done with Hayden.